#38 Green Thumbs: Radishes (grades 3-8)
Regular price $23.95
1/15: cardboard milk cartons, half gallon
1/15: pairs scissors, some heavy-duty. Blunt-nosed children's scissors aren't strong enough to cut through milk cartons.
* 1/3: rolls masking tape
1/3: rolls soft, absorbent paper towels
1/15: ball-point pens
1/3: plastic milk jugs, gallon size, optional for carrying water (or pitchers)
1/2: packets radish seeds from garden store -- generally sold in 4-5 gram envelopes. Choose any fast-growing summer type, maturing in 3-4 weeks, such as Champion or Scarlet Globe.
1/30: file folders (or notebooks)
* 1/2: rolls aluminum foil. Twelve-inch width works best.
2/30: index cards, 4x6 inch size
1/15: size-D batteries -- dead or alive
* 1/3: rolls transparent tape -- matte 'write-on' type (or masking tape)
1/6: quarts commercial potting mix -- ordinary garden soil may introduce molds, fungi, or pests into your growing system.
1/15: styrofoam trays. Meat trays are suitable, equivalent in area to a half sheet of paper, no more than 1 inch deep. Lids cut from styrofoam egg cartons also work.
1/30: sharp pencils with soft, clean erasers
* 5/75: baby food jars with lids -- assorted sizes OK
1/1: roll plastic wrap
* 2/30: paper clips
1/15: jars with lids -- pint or quart size
1/1: box table salt
1/1: bottle vinegar
1/5: drinking glasses (or beakers)
1/5: teaspoons
* 1/15: hand lenses (optional)
- Lesson 1: To sprout radish seeds in a warm, moist environment, and organize them for future study.
- Lesson 2: To construct foil mini-planters for growing radish seeds in potting soil.
- Lesson 3: To observe how seedlings develop and grow. To record small details and overall proportions with the aid of a drawing grid.
- Lesson 4: To classify stages of development in 20 radish seedlings. To visually express daily development profiles on a bar graph.
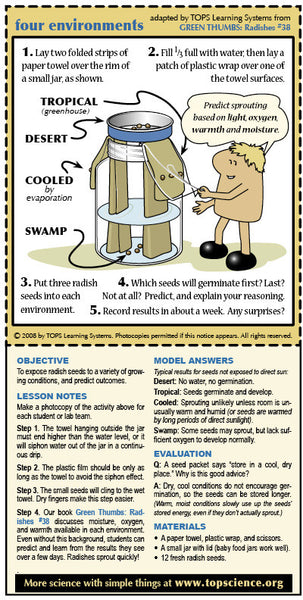
- Lesson 5: To attempt to sprout radish seeds in 4 unique environments, controlling all important variables.
- Lesson 6: To study the effects of light and darkness on the germination and growth of radish seeds.
- Lesson 7: To examine the effect of crowded growing conditions on radish health and rate of maturation.
- Lesson 8: To plot on a graph sprouting rate in a population of radish seeds. To interpret a sigma curve.
- Lesson 9: To construct a self-watering greenhouse environment for maintaining and observing radish seedlings.
- Lesson 10: To accurately record the growth of radish seedlings over weekly intervals on a drawing grid.
- Lesson 11: To examine experimental outcomes from activity 6. To understand how lighting conditions affect the growth of radishes and their ability to photosynthesize.
- Lesson 12: To use a radish model to predict how cotyledons and hypocotyls grow to maximize exposure to light.
- Lesson 13: To examine experimental outcomes from activity 5. To evaluate previous predictions, then make new ones about how the radishes will continue to grow in their new greenhouse environment.
- Lesson 14: To measure and record the growth in developing radish seedlings over an extended period of time.
- Lesson 15: To determine what part of a radish seedling forms the commercial vegetable. To trace the flow of energy from the sun, through a radish, to you, the consumer.
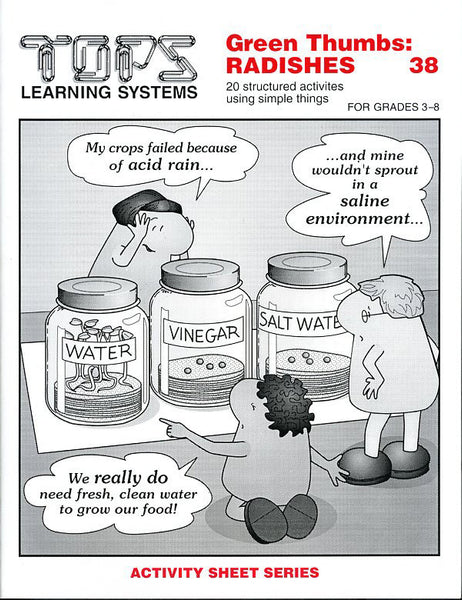
- Lesson 16: To expose radish seeds to acid and salt water. To appreciate that acid rain or soil salinity inhibit seed germination.
- Lesson 17: To observe how the root and hypocotyl of an upside-down radish seedling reorient in response to gravity. To distinguish between positive and negative geotropisms.
- Lesson 18: To observe how radish roots grow in response to abrupt changes in moisture.
- Lesson 19: To compare cotyledons with true leaves according to structure, function and origin.
- Lesson 20: To graph the data collected in activity 14. To interpret radish growth in terms of a sigma curve.
Possibly your seeds are too old, or have been stored in a warm and/or moist environment, using up their energy reserves before you planted them. In any batch, there will be some seeds that simply don't sprout -- packages generally tell you the germination rate (the percentage that are likely to succeed). But if you plant a half-dozen or more fresh seeds, at least half of them should have sprouted. It's mathematically pretty unlikely that you'd have planted only duds from a larger batch. It is frustrating, but seeds are tiny, and often fragile, packets of life subject to changing conditions around them. If your radish seeds were supplied in a kit from another company, please contact them directly. Or purchase a fresh replacement package from your local garden store.
Our radishes aren't growing true leaves. What's the problem?
Without seeing your arrangement, we can only guess. The sprouts probably aren't getting enough light to develop properly. If this is the case, plants will also become very "leggy" (on long, weak, thin stems) and will lean precariously toward the strongest light source. The sprouts may also be quite pale. Classrooms have large windows and bright fluorescent bulbs that usually provide adequate light, but homes are often darker. A south-facing window may help (check sprouts carefully for wilting or sunburn if in direct sunlight). Positioning a desk lamp, either incandescent or fluorescent, as near as possible to the sprouts for several hours a day can also be helpful. Turn the planters around occasionally to correct leaning. If your climate is mild, placing the plants on a porch or patio in dappled shade might help, too, and the fresh air and bright light helps discourage mold and mildew. Be sure to monitor plants carefully for drying or overheating. One other possibility is that your sprouts have become too dry between waterings, or the soil stays too wet. Keep them consistently moist, but not soggy.
Our radishes are growing too fast/too slow to match your model answers. How do we adapt?
Here's where "cookbook" science gets real. The results of your experiments will never be precisely average, especially where growing things are concerned. This can be disconcerting, but it is the nature of, well, nature! Our model answers are the best average we could observe from growing plants in typical classroom conditions in a temperate climate (lots of steady light, temperatures moderately warm during the day and cool at night). If your radishes are way ahead of schedule, they're growing in "better-than-average" conditions. If they're too slow, they may be getting less light or warmth than our test sprouts. Probably the most important thing to remember is this: science is the process of observing what actually happens, not forcing hoped-for results to match an ideal schedule. Scientists develop hypotheses (tentative assumptions) based on what they observe, and then experiment (design ways to interact with their subjects) to check the accuracy of a hypothesis. If it was wrong, they develop and test a new hypothesis. You're doing good science if you're doing these things, whether or not your results match the answer key.
Our plants are growing lots of mold. Should we start over?
Molds and mildews thrive in warm, humid climates. If this is your situation, try any of the following:
• BLEACH! Pre-sterilize containers by dipping in a solution of 10% chlorine bleach and 90% water. If dipping isn't workable, apply generously with a spray bottle or clean sponge. You can also add a couple of drops of bleach to the water in your growing systems. Too much will be toxic to the plants. You can also rinse the seeds for 15 seconds in a 10% bleach solution before you sprout them. Seeds are often "infected" with mold spores before you plant them.
• AND/OR: Gently lift the seedlings and replace the paper towels as needed. A fuss, but better than the alternative. You might be able to lift out fuzzy clumps of mildew with a toothpick or a small paint brush moistened with slightly chlorinated water.
• AND/OR: Open containers to fresh air and dappled sunshine at times you can keep an eye on them. Monitor the plants for wilting, yellow patches, curled or darkened edges - sunshine can be quite a shock to previously sheltered seedlings. Be sure they don't dry out. You might wish to offer extra credit to a responsible student to monitor the seedlings every hour or so.
NOTE: Because molds can cause allergic reactions, avoid inhaling them when handling your plants. Wear a dust mask or scarf over your nose and mouth to minimize your exposure. Finally, if your plants are growing well, they should survive having some mold growing on or around them.
EXTENSION ACTIVITY: Do real science on your own! Study mold and mildew! We've read (haven't tried) that spraying seedlings with CHAMOMILE tea discourages mildew on new seedlings. Other kitchen SPICES, such as thyme and oregano, may help, since they are a traditional means of keeping food from spoiling. A weak solution of the widely popular TEA TREE OIL, dispersed in water with a few drops of liquid hand soap, might be very effective. A solution of BAKING SODA (sodium bicarbonate), about one teaspoon per pint of water, has recently been found to fend off certain mildews in the garden. Spray lightly and monitor closely, though, since too much sodium can be deadly. And the latest scoop from the horticultural world is that MILK misted on plants inhibits some garden pathogens. (It could foster others, though, so stay observant.)
#38 RADISHES IN ACTION!
See how one homeschooler has used this lesson (and other TOPS modules!) with great success at this website.
If you come up with any other great results, we'd love to pass them on to others, so be sure to let us know!
TEACHING Standards
These 20 activity sheets promote excellence in science teaching by these NSES criteria:
Teachers of science...
A: ...plan an inquiry-based science program. (p. 30)
B: ...guide and facilitate learning. (p. 32)
C: ...engage in ongoing assessment of their teaching and of student learning. (p. 37)
D: ...design and manage learning environments that provide students with the time, space, and resources needed for learning science. (p. 43)
CONTENT Standards
These 20 activity sheets contain fundamental content as defined by these NSES guidelines (p. 109). • Represent a central event or phenomenon in the natural world. • Represent a central scientific idea and organizing principle. • Have rich explanatory power. • Guide fruitful investigations. • Apply to situations and contexts common to everyday experiences. • Can be linked to meaningful learning experiences. • Are developmentally appropriate for students at the grade level specified.
Unifying Concepts and Processes
NSES Framework: Systems, order, and organization • Evidence, models and explanation • Constancy, change, and measurement • Evolution and equilibrium • Form and function
Core Concept/Process: All living systems 'eat' sunlight, either directly or indirectly.
Science as Inquiry (content standard A)
NSES Framework: Identify questions that can be answered through scientific investigations. • Design and conduct a scientific investigation. • Use appropriate tools and techniques to gather, analyze, and interpret data. • Develop descriptions, explanations, predictions, and models using evidence. • Think critically and logically to make the relationships between evidence and explanations. • Communicate scientific procedures and explanations.
Core Inquiries: Sharpen observation and communication skills. • Observe similarities and differences. • Conduct investigations over a period of several weeks. • Study radish growing conditions. • Control variables. • Communicate results.
Life Science (content standard C)
NSES Framework: Life cycles of organisms • Structure and function in living systems • Regulation and behavior • Populations and ecosystems • Diversity and adaptations of organisms • Interdependence of organisms • Matter, energy, and organization in living systems
Core Content: Study growth habits and cycles • Plant structures: cotyledons, hypocotyls, true leaves • Growing variables: light, water and temperature • Photosynthesis • Phototropism, geotropism and hydrotropism.
Science in Personal and Social Perspectives (content standard F)
NSES Framework: Changes in environments • Environmental qualityCore Content: Effects of acidic and salty environments on radish seed germination and plant growth.