#39 Green Thumbs: Corn and Beans (grades 4-12)
Regular price $23.95
1/30: pairs heavy-duty, pointed scissors
* 1/3: boxes paper clips, medium size, all the same brand
24/650: sheets notebook paper -- college ruled preferred, wide ruled OK
1/4: rolls clear tape
1/1: stapler
* 1/3: spools thread
* 1/2: rolls masking tape
1/15: metric rulers (optional)
* 1/1: straight plastic drinking straws
* 3/45: straight pins
* 1/15: wooden clothespins
1/15: empty cans, medium size, 14-16 ounces
* 1/1: roll aluminum foil
1/15: size-D batteries, dead or alive
1/1: pkg dry pinto beans. Test viability in advance: some brands may be irradiated. If they fail to sprout, purchase more from a garden or health-food store.
1/1: pkg dry popcorn. Test viability in advance:some brands may be irradiated. If they fail to sprout, purchase more from a garden or health-food store.
* 3/45: baby food jars
* 4/60: bottle caps
1/15: plastic tubs; margarine or yogurt
1/4: rolls paper towels
1/15: cardboard milk cartons (or styrofoam egg cartons)
1/1: water source
* 1/30: hand lenses (optional)
0.5/8: quarts vermiculite, sold in garden departments
1/1: jar of petroleum jelly
* 1/1: bottle blue food coloring
* 1/30: lids from baby food jars
* 1/30: thick rubber bands
1/15: large paper grocery bags
1/1: bag potting soil (optional)
1/1: pkg dried lentils. Test viability in advance: if grocery store seeds are irradiated, purchase more from a garden or health-food store.
1/1: pkg wheat berries. Test viability in advance: if grocery store seeds are irradiated, purchase more from a garden or health-food store.
TUE/ -3: To build a gram balance for tracking the growth rates of corn and beans by weight.
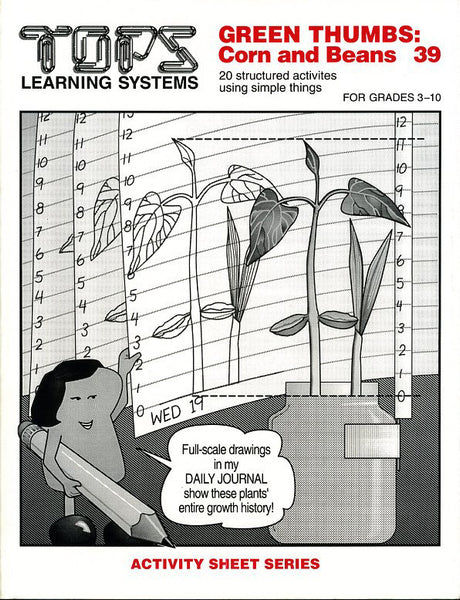
WED/ -2: To construct a Pole Planter calibrated in 'notebook paper lines' to facilitate drawing corn and bean plants to their actual size and height. To establish a suitable, out-of-the-way, growing space for plants and equipment.
THU/ -1: To practice observation and drawing skills by mapping seed coat patterns on a pinto bean.
FRI/ 0: To construct a self-watering Seed Tray. To begin sprouting corn and bean seeds on 'day 0.'
MON/ 3: To record daily observations of germinating corn and bean seeds in a plant journal by drawing and labeling the developing structures.
TUE/ 4: To compare and contrast dry seeds with water-soaked seeds in appearance, size and weight. To continue the daily sprout observations started on day 3.
WED/ 5: To dissect water-swollen corn and bean seeds and draw their interior structures. To compare and contrast the monocotyledon in the corn seed with the dicotyledon in the bean seed. To continue daily sprout observations started on day 3.
THU/ 6: To plant a developing bean and corn sprout in the Pole Planter at 'ground level' at 'line 0.' To continue daily sprout observations started on day 3, noting root caps, primary roots, root hairs, secondary roots, hypocotyls, dicotyledons (on the bean); root tips, primary roots, root hairs, adventitious roots, endosperms, cotyledons, coleoptiles (on the corn).
FRI/ 7: To summarize corn and bean seedling development over the first week. To begin recording daily observations of the corn and bean seedling planted in the Pole Planter on day 6.
MON/ 10: To refresh the Seed Tray. To save the most developed seedlings for experimentation. To germinate new seeds. To make daily drawings of the corn and bean growing in the Pole Planter, preserving a one-to-one correspondence between lines of notebook paper on the Pole Planter and in the Plant Journal.
TUE/ 11: To make daily actual-size drawings of corn and bean plants growing in the Pole Planter. To notice how seedlings grow toward the strongest light source.
WED/ 12: To weigh 5 dry bean seeds and 5 dry corn seeds so weight gains through water absorption and photosynthesis can be observed and graphed over time. To make actual-size drawings of the corn and bean plants growing in the Pole Planter.
THU/ 13: To reweigh the 5 bean seeds and 5 corn seeds germinated on day 12. To continue daily actual-size drawings of the corn and bean plants growing in the Pole Planter.
FRI/ 14: To begin experiments in photosynthesis and plant respiration. To continue daily actual-size drawings of the corn and bean growing in the Pole Planter.
MON/ 17: To continue tracking weight gain in just one pair of corn and bean seedlings germinated on day 12. To continue daily actual-size drawings of the corn and bean plants growing since day 0.
TUE/ 18: To repeat day 17 observations in the Plant Journal. To uproot a corn and bean plant from the Seed Tray to compare and contrast developing root structures.
WED/ 19: To repeat day 17 observations in the Plant Journal. To compare leaf development in monocots and dicots.
THU/ 20: To repeat day 17 observations in the Plant Journal. To remove the cotyledons from a bean plant in the Seed Tray and compare its growth rate to a control with cotyledons still attached.
FRI/ 21: To repeat day 17 observations in the Plant Journal. To mark a bean and corn plant with dots of food coloring from bottom to top to study growth and cell development.
MON/ 24: To repeat day 17 observations in the Plant Journal. To model cell elongation and new cell growth with a rubber band.
TUE/ 25: To repeat day 17 observations in the Plant Journal. To graph daily weight gain data from day 12 to day 25. To follow up with the cotyledon experiment from day 20.
WED/ 26: To make a final actual-size sketch of a corn and bean plant after 26 days of development. To graph daily height gains up the Pole Planter beginning at day 7. To evaluate experiments in photosynthesis and plant respiration.
THU/ 27: To examine the roots, stems, leaves and flowers on drawings of mature corn and bean plants. To prepare a baby-food-jar growing system to track a parallel monocot/dicot learning system involving lentils and wheat berries.
Commercially packaged popcorn and/or pinto beans may have been sterilized with radiation to increase shelf life, but this kills the seed. Try seeds from a garden or health food store. If only some of your seeds sprout, they are likely too old, or have been stored in a warm and/or moist environment that drains their energy reserves before planting. Additionally, in any batch of seeds, there will be some seeds that simply don't sprout. Seed packages often specify a germination rate (the percentage of seeds that are likely to succeed).
Our seedlings are growing too fast/too slow to match your model answers. How do we adapt?
Without seeing your arrangements, we can only guess. The sprouts may not be getting enough light to develop properly. If this is the case, they will grow "leggy" on long, weak, thin stems that lean precariously toward the strongest light source. The sprouts may also look quite pale.
Classrooms have large windows and bright fluorescent bulbs that usually provide adequate light, but homes are often darker. A south-facing window may help (check sprouts carefully for wilting or sunburn if in direct sunlight). Positioning a desk lamp, either incandescent or fluorescent, as near as possible to the sprouts for several hours a day can also be helpful. Turn the planters around occasionally to correct leaning. If your climate is mild, placing the plants on a porch or patio in dappled shade might help, too, where fresh air and bright light also help discourage mold and mildew. Be sure to monitor plants carefully for drying or overheating.
If plants grow so tall they begin to flop, consider making a string trellis, attached above the window frame with thumbtacks. Tie stems loosely to your trellis to avoid damaging them (young kids will need help). Because this alternative eliminates portability, future observations must happen at the window. As always when doing science, feel free to engineer a solution that fits your circumstances better.
In any event, here's where "cookbook" science gets real. Your experimental results will never be precisely average, especially where growing things are concerned. This can be disconcerting, but it is the nature of, well, nature! Our model answers are the best average we could observe from growing plants in typical classroom conditions in a temperate climate (lots of steady light, temperatures moderately warm during the day and cool at night). If your plants are way ahead of schedule, they're growing in "better-than-average" conditions. If they're too slow, they may be getting less light or warmth than our test sprouts.
Probably the most important thing to remember is this: science is the process of observing what actually happens, not forcing hoped-for results to match an ideal schedule. Scientists develop hypotheses (tentative assumptions) based on what they observe, and then experiment (design ways to interact with their subjects) to check the accuracy of a hypothesis. If it was wrong, they develop and test a new hypothesis. You're doing good science if you're doing these things, whether or not your results match the answer key.
Our plants are growing lots of mold. Should we start over?
Molds and mildews thrive in warm, humid conditions. If this is your situation, try any of the following:
• BLEACH! Pre-sterilize containers by dipping in a solution of 10% chlorine bleach and 90% water. If dipping isn't workable, apply generously with a spray bottle or clean sponge. You can also add a couple of drops of bleach to the water in your growing systems. Too much will be toxic to the plants. You can also rinse the seeds for 15 seconds in a 10% bleach solution before you sprout them. Seeds are often "infected" with mold spores before you plant them.
• AND/OR: Gently lift the seedlings and replace the paper towels as needed. A fuss, but better than the alternative. You might be able to lift out fuzzy clumps of mildew with a toothpick or a small paint brush moistened with slightly chlorinated water.
• AND/OR: Open containers to fresh air and dappled sunshine at times you can keep an eye on them. Monitor the plants for wilting, yellow patches, curled or darkened edges — sunshine can be quite a shock to previously sheltered seedlings. Be sure they don't dry out. You might wish to offer extra credit to a responsible student to monitor the seedlings every hour or so.
NOTE: Because mold and mildew can cause allergic reactions, avoid inhaling them when handling your plants. You could wear a dust mask or scarf over your nose and mouth to minimize your exposure. Finally, if your plants are growing well, they should survive having some mold growing on or around them.
EXTENSION ACTIVITY: Do real science on your own! Study mold and mildew! We've read (haven't tried) that spraying seedlings with CHAMOMILE tea discourages mildew on new seedlings. Other kitchen SPICES, such as thyme and oregano, may help, since they are a traditional means of keeping food from spoiling. A weak solution of the widely popular TEA TREE OIL, dispersed in water with a few drops of liquid hand soap, might be very effective. A solution of BAKING SODA (sodium bicarbonate), about one teaspoon per pint of water, has recently been found to fend off certain mildews in the garden. Spray lightly and monitor closely, though, since too much sodium can be deadly. And the latest scoop from the horticultural world is that MILK misted on plants inhibits some garden pathogens. (It could foster others, though, so stay observant.)
If you come up with any great results, we'd love to pass them on to others, so be sure to let us know!.
TEACHING Standards
These labs and journal pages promote excellence in science teaching by these NSES criteria:
Teachers of science...
A: ...plan an inquiry-based science program. (p. 30)
B: ...guide and facilitate learning. (p. 32)
C: ...engage in ongoing assessment of their teaching and of student learning. (p. 37)
D: ...design and manage learning environments that provide students with the time, space, and resources needed for learning science. (p. 43)
CONTENT Standards
These labs and journal pages contain fundamental content as defined by these NSES guidelines (p. 109). • Represent a central event or phenomenon in the natural world. • Represent a central scientific idea and organizing principle. • Have rich explanatory power. • Guide fruitful investigations. • Apply to situations and contexts common to everyday experiences. • Can be linked to meaningful learning experiences. • Are developmentally appropriate for students at the grade level specified.
Unifying Concepts and Processes
NSES Framework: Systems, order, and organization • Evidence, models and explanation • Constancy, change, and measurement • Form and function
Core Concept/Process: Flowering plants are traditionally divided into two classes -- monocots and dicots.
Science as Inquiry (content standard A)
NSES Framework: Identify questions that can be answered through scientific investigations. • Design and conduct a scientific investigation. • Use appropriate tools and techniques to gather, analyze, and interpret data. • Develop descriptions, explanations, predictions, and models using evidence. • Think critically and logically to connect evidence with explanations. • Communicate scientific procedures and explanations. • Use mathematics in all aspects of scientific inquiry.
Core Inquiries: Maintain a daily plant journal to track seed germination and growth. • Sharpen observation skills. • Develop experimental follow-through.
Life Science (content standard C)
NSES Framework: The characteristics of organisms • Life cycles of organisms • Organisms and environments • Structure and function in living systems • Regulation and behavior • Diversity and adaptations of organisms
Core Content: Distinguish monocots from dicots • Identify and study plant structures • Understand photosynthesis and plant respiration • Compile a complete written and visual record of plant growth • Graph daily height and weight gains • Study how leaves photosynthesize • Examine the role of cotyledons in plant development.
Science and Technology (content standard E)
NSES Framework: Abilities of technological design • Understanding about science and technologyCore Content: Design lab equipment and tools to germinate, grow, measure, and weigh corn and beans.

